

The magic of Gradle: create Windows installers, Debian packages, manage a PPA, and optional sub-projects
Gradle is great build tool. Compared to Ant or Maven, it’s so much easier to use and write proper code for it — it’s unbelievable at times. A little while ago, I switched from an ugly Ant/Maven installation to Gradle with my open source project Syncany. Ever since then, I am simply amazed about what Gradle can do. Granted, it’s not always easy to understand and the lack of proper documentation and IDE support makes things more like a trial-and-error-based packaging experience. However, the amount of time that it saves is worth it.
Since I really like Gradle and I myself often have a hard time finding proper answers for the questions I have, I’d like to demonstrate a few solutions that I have come up with. In particular, I’ll describe how to create a Windows installer using Inno Setup under Linux, create Debian packages and manage a PPA (debuild/dput) as well as how to add an optional Gradle sub-project.
Content
0. Real-world code available at GitHub
For the impatient folks, please note that this blog post talks about a real-life project. The entire code and Gradle build scripts are available on GitHub. Check out the Syncany organization page for a list of all the projects, the the main project page, or simply check out the build.gradle file directly.. The post relies on revision 74c737d871.
1. Project setup
1.1. Multi-project setup
Syncany comprises multiple modules (sub-projects) that depend on each other. Luckily Gradle provides a neat sub-projects support out of the box. There are many examples and blog posts that show you how to do multi-projects in Gradle, so I’m not going into detail here. Instead, I’ll just show the essential parts of the configuration.
The settings.gradle file defines the mandatory sub-projects for the project:
|
1 2 3 4 |
include 'syncany-lib' include 'syncany-cli' include 'syncany-util' include 'syncany-daemon' |
And the build.gradle (and all of the included files) define the sub-projects in detail:
|
1 2 3 4 5 6 7 8 9 10 11 12 13 14 15 16 |
subprojects { apply plugin: 'java' sourceSets { main { java { srcDir 'src/main/java'} resources { srcDir 'src/main/resources'} } test { java { srcDir 'src/test/java'} resources { srcDir 'src/test/resources'} } } // ... |
1.2. Optional additional Gradle projects (from another Git repo)
Syncany has a concept of storage plugins: Users can extend the functionality of Syncany by downloading and installing plugins. These plugins are not part of the main project and everyone can write those plugins.
Obviously these plugins can’t be part of the main project source tree. In fact, they probably shouldn’t even be part of the same Git repository. However, even though plugins are defined in a completely different Git repository, they still depend on the main project. For a plugin to build correctly, it must know and embed the main project.
So what we actually want is to dynamically add a Gradle subproject. Using git subtree, this can be easily done: Suppose we have an optional plugin syncany-plugin-sftp from which we’d like to build a plugin JAR file. Using git-subtree, the main project is added in a subfolder core (e.g. by git remote add coreorigin git://...; git subtree pull --prefix=core coreorigin master --squash). That way, the entire main project code is available to the plugin (listing shortened):
|
1 2 3 4 5 6 7 8 9 10 11 12 13 14 15 |
core/ gradle/ syncany-assets/ syncany-cli/ syncany-daemon/ syncany-lib/ syncany-util/ build.gradle << Main project build file ... src/ main/ test/ build.gradle << Plugin build file settings.gradle << Adds plugin project dynamically, redefines rootProject ... |
In its own build.gradle, the plugin can define its own dependencies and tasks. However, if there are a lot of similar plugins (or optional subprojects), including code from the main project might be a good idea: Using apply from: 'core/...' can be used to avoid duplicate build code — something like I’ve done in this SFTP plugin.
All that’s missing to a complete configuration is to tell Gradle about the relationship between this project (= the plugin) and the main project in the core folder. In the settings.gradle file, we need to tell Gradle that the rootProject is located in core and that the current folder is actually just a plugin. If we wouldn’t redefine rootProject.projectDir, Gradle would assume that . (= the plugin directory) is the root project. That might work in some cases, but it didn’t in mine. Here’s how you can redefine the root project:
|
1 2 3 4 5 6 7 8 9 10 11 12 13 14 15 16 17 18 19 20 21 |
rootProject.projectDir = file('core') include 'syncany' include 'syncany-lib' include 'syncany-cli' include 'syncany-util' include 'syncany-daemon' project(':syncany').projectDir = file('core') project(':syncany-lib').projectDir = file('core/syncany-lib') project(':syncany-cli').projectDir = file('core/syncany-cli') project(':syncany-util').projectDir = file('core/syncany-util') project(':syncany-daemon').projectDir = file('core/syncany-daemon') // Include this plugin as subproject! File pluginDir = file('.') String pluginName = pluginDir.getParentFile().name include pluginName project(':' + pluginName).projectDir = pluginDir |
This code does the regular includes, but then tells Gradle where to map the given virtual project names, so that :syncany maps to core (main project), :syncany-lib maps to core/syncany-lib, and so on.
Since this is very generic code (applicable to any plugin), this code can be moved to a separate .gradle-file in the main project, and then included by the plugin.
2. Versioning releases in Gradle (using the Git commit)
When generating snapshots for the project, a proper versioning and file naming is necessary. Ideally, we want the version to follow semantic versioning 2.0 — so basically have a MAJOR.MINOR.PATCH version as well as alphabetically orderable build information such as compile date and the Git revision in the build metadata. For Syncany, a snapshot version looks like this: 0.1.5-alpha+SNAPSHOT.1405262224.git9c07793, and a normal release looks like this: 0.1.5-alpha.
In Syncany’s Gradle configuration, the following code is used to create this version:
|
1 2 3 4 5 6 7 8 9 10 |
project.ext { applicationVersion = "0.1.5-alpha" applicationRelease = isApplicationRelease() applicationDate = new Date() applicationRevision = getRevision() applicationVersionSnapshot = (!applicationRelease) ? "+SNAPSHOT.${asUTC(applicationDate, 'yyMMddHHmm')}.git${applicationRevision}" : "" applicationVersionFull = "${applicationVersion}${applicationVersionSnapshot}" } |
As you can see above, we first determine three things: the compile date, whether or not this is a release version (= commit on the master branch, as per the nvie branching model), and the Git commit/revision. This information is then simply concatenated.
Retrieving the Git branch (“Is this a release?”) and the Git commit happens in the isApplicationRelease() and getRevision() methods. They simply use git log -n 1 --pretty=%d HEAD to determine the branch (also works on a detached branch, i.e. on Travis-CI) and git rev-parse --short HEAD to determine the commit:
|
1 2 3 4 5 6 7 8 9 10 11 12 13 14 15 16 17 18 19 20 21 22 23 24 25 26 27 28 29 30 31 32 33 |
rootProject.ext.execAndGetOutput = { String command -> try { def stdout = new ByteArrayOutputStream() exec { workingDir rootProject.projectDir commandLine command.split() standardOutput = stdout } return stdout.toString().trim() } catch (Exception e) { return null } } rootProject.ext.asUTC = { Date date, String format -> def snapshotDateFormat = new SimpleDateFormat(format) snapshotDateFormat.setTimeZone(TimeZone.getTimeZone('UTC')) return snapshotDateFormat.format(date) } rootProject.ext.getRevision = { String currentCommit = execAndGetOutput("git rev-parse --short HEAD") return (currentCommit != null) ? currentCommit : "UNKNOWN" } rootProject.ext.isApplicationRelease = { String currentBranches = execAndGetOutput("git log -n 1 --pretty=%d HEAD") return currentBranches.contains("master") } |
These methods can be called from any Gradle build scripts in all sub-projects, because we define their scope to be in the rootProject. Especially the execAndGetOutput() method is very useful: It can be used to run any Linux/Windows command. Since I want the central parts of the Syncany build script to run on Windows and Linux, the git commands must be platform-independent.
3. Building Debian/Ubuntu packages and uploading to a PPA
I’d like Syncany to be available on Debian and Ubuntu systems (since I myself use an Ubuntu-based distro), so having a proper .deb-file installation and a PPA is a must. Here’s how to do it with the help of several Gradle tasks and shell scripts.
Debian packages are built using the debuild tool, uploads to a PPA are managed via dput. To create valid Debian packages, debuild expects a debian directory containing files such as debian/control, debian/changelog, etc. (Details to Debian/Ubuntu packaging can be found in the Debian New Maintainers’ Guide or the Ubuntu Packaging Guide).
If these files are present and valid, debuild -i -us -uc -b builds a standalone .deb file, and debuild -S builds the source package that can be uploaded to a Launchpad PPA. For Syncany, I completely automated both of these processes in the following tasks (see packaging.debian.gradle):
- gradle debianPrepare<distribution> creates a source directory ready for debuild and includes a valid debian/changelog (generated from the CHANGELOG.md).
- gradle debian generates a standalone .deb file from the above-prepared directory using debuild -i -us -uc -b. This task depends on a debianPrepare*-task.
- gradle ppa generates a source package and uploads it to the PPA. It uses two helper shell scripts debuild-signed.sh and dput-ppa.sh. As above, this task depends on a debianPrepare*-task.
3.1. Standalone .deb-file
Compared to the PPA upload, creating a standalone Debian package is really easy: The debianPrepare<distribution> task depends on the installApp task of the Gradle application plugin (which copies relevant JAR files to a lib folder and shell/batch scripts to a bin folder). In addition to these two folders, it copies a prepared debian folder and creates a valid debian/changelog file.
The task is created using Gradle’s task rules. It matches every string that begins with ‘debianPrepare’ and uses the rest of the task name as the Ubuntu/Debian distribution. This distribution string is used in the changelog file and the filename. Running gradle debianPrepareTrusty, for instance, will ultimately result in syncany_0.1.5.alpha~trustyppa1_all.deb (for Ubuntu Trusty Tahr). Running gradle debianPrepareSaucy, however, will result in syncany_0.1.5.alpha~saucyppa1_all.deb (for Ubuntu Saucy Salamander).
Here’s how the task looks like (check out the full file in packaging.debian.gradle):
|
1 2 3 4 5 6 7 8 9 10 11 12 13 14 15 16 17 18 19 20 21 22 23 24 25 26 27 28 29 30 |
(excerpt)" lang="groovy">tasks.addRule("Pattern: debianPrepare<distribution>") { String taskName -> if (taskName.startsWith("debianPrepare")) { task(taskName, dependsOn: [installApp, debianClean]){ String debianDistribution = (taskName - "debianPrepare").toLowerCase() String debianPpaVersion = (!"unstable".equals(debianDistribution)) ? "~${debianDistribution}ppa1" : "" String debianApplicationVersionFull = "${applicationVersionFull}".replaceAll("-", ".") + debianPpaVersion doLast { copy { from rootProject.files("build/install/syncany") into rootProject.file("build/debian/syncany") exclude("**/*.bat") } // ... copy { from rootProject.files("gradle/debian/debian") into rootProject.file("build/debian/syncany/debian") } exec { workingDir rootProject.file("gradle/debian") commandLine "./makechangelog.pl", "${debianDistribution}", "${debianApplicationVersionFull}" } } } } } </distribution> |
If we’re building a package for Ubuntu Trusty Tahr, for instance, the folder structure looks like this after running the task:
|
1 2 3 4 5 6 7 8 9 10 11 12 13 14 15 16 17 18 19 20 21 22 23 24 25 26 |
$ gradle debianPrepareTrusty ... $ find build/debian/syncany/ build/debian/syncany/ build/debian/syncany/LICENSE.md build/debian/syncany/README.md build/debian/syncany/AUTHORS.md build/debian/syncany/debian build/debian/syncany/debian/control build/debian/syncany/debian/copyright build/debian/syncany/debian/docs build/debian/syncany/debian/prerm build/debian/syncany/debian/source build/debian/syncany/debian/source/format build/debian/syncany/debian/install build/debian/syncany/debian/changelog build/debian/syncany/debian/compat build/debian/syncany/debian/postinst build/debian/syncany/debian/rules build/debian/syncany/bin build/debian/syncany/bin/syd ... build/debian/syncany/lib build/debian/syncany/lib/commons-codec-1.8.jar ... |
Except for the debian/changelog file, all the other files in debian/* are just copied from the template folder. The changelog file is created using a tiny perl script that translates my Markdown-based CHANGELOG file to the proper Debian changelog format. After the script is run, the changelog file looks like this:
|
1 2 3 4 5 6 7 8 9 |
syncany (0.1.5.alpha+SNAPSHOT.1405271541.git74c737d~trustyppa1) trusty; urgency=low * Developer/alpha release (**STILL NOT FOR PRODUCTION USE!**) * Features and significant changes: + Implemented Ubuntu PPA and signed deb files #69 -- Syncany Team <hello@syncany.org> Tue, 27 May 2014 17:41:50 +0200 ...</hello@syncany.org> |
While the changelog file seems really unimportant, it is used by debuild to determine the package name, version and the keypair to sign the package with. Based on this changelog file, the resulting package will be named syncany_0.1.5.alpha+SNAPSHOT.1405271541.git74c737d~trustyppa1_all.deb:
|
1 2 3 4 5 |
$ gradle debian ... $ ls -l build/debian/*.deb syncany_0.1.5.alpha+SNAPSHOT.1405271541.git74c737d~trustyppa1_all.deb |
3.2. Signed PPA upload
Personal package archives (PPA) a very essential and important part to distribute software packages for Ubuntu/Debian. Launchpad offers a pretty neat infrastructure to manage PPAs: Instead of uploading the .deb-file yourself, Launchpad expects you to build a so called source package with debuild, sign it with your private key (for which the public key is known by Launchpad) and upload it using dput. Launchpad will then build the .deb-file on their machines and provide it in the PPA.
If you do this on your local machine, it’s pretty straight forward:
- Generate a RSA keypair, upload the public key to a keyserver and make it known to Launchpad
- Run debuild -S on the prepared source directory (like above, e.g. via gradle debianPrepareTrusty) to package the source files archive (.tar.gz), create a changes file (.changes) and a detached signature file (.dsc).
- And then upload all of these files via dput ppa:syncany/snapshot
Doing that from a script via Gradle (especially on Travis-CI) is not as easy, because a private key is required — and that key is obviously meant to be private, and not up on GitHub. And yet, I uploaded a the Syncany Team private key to GitHub. It’s encrypted with an AES-256 symmetric key, so don’t get any ideas :D.
To automate all that on Travis-CI without exposing the private key (to anyone but Travis), a bit of fiddling was necessary. Here’s how I did it:
- The generated private key is protected with a passphrase (key-priv), exported to syncany-team.asc (e.g. using Seahorse) and then encrypted with a second passphrase (key-wrap, = AES key): cat syncany-team.asc | gpg --symmetric --cipher-algo aes256 > syncany-team.asc.aes256.
- The two passphrases are written to Travis’ encrypted environment variables and added to the .travis.yml file (here: SYNCANY_GPG_KEY_WRAP and SYNCANY_GPG_KEY_PRIV).
- The Gradle task gradle ppa runs two shell scripts: (1) debuild-signed.sh decrypts the private key, sets up a GnuPG keyring and runs debuild -S, and (2) dput-ppa.sh simply runs dput ppa:syncany/(snapshot|release).
Here’s what the call sequence during build time looks like. Note that this is shortened output. Please checkout the debuild-signed.sh script for details:
|
1 2 3 4 5 6 7 8 9 10 11 12 13 14 15 |
# Save keys from environment variables to files echo $SYNCANY_GPG_KEY_WRAP > build/debian/gpg/key-wrap echo $SYNCANY_GPG_KEY_PRIV > build/debian/gpg/key-priv # Decrypt keypair (incl. private key) and import to GnuPG keyring cat gradle/debian/gpg/syncany-team.asc.aes256 | \ gpg -d --no-tty --no-use-agent --passphrase-file=build/debian/gpg/key-wrap \ > build/debian/gpg/syncany-team.asc gpg --homedir=build/debian/gpg --no-tty --no-use-agent \ --import build/debian/gpg/syncany-team.asc # Build signed source package for keypair 651D12BD debuild -k651D12BD -S -p"gpg --homedir=build/debian/gpg --no-tty \ --no-use-agent --passphrase-file=build/debian/gpg/key-priv" |
After running this, the source package files are created:
|
1 2 3 4 5 6 |
$ ls -1 build/debian/ syncany syncany_0.1.5.alpha+SNAPSHOT.1405271541.git74c737d~trustyppa1.dsc syncany_0.1.5.alpha+SNAPSHOT.1405271541.git74c737d~trustyppa1_source.build syncany_0.1.5.alpha+SNAPSHOT.1405271541.git74c737d~trustyppa1_source.changes syncany_0.1.5.alpha+SNAPSHOT.1405271541.git74c737d~trustyppa1.tar.gz |
That’s it. Once dput is run for the correct PPA and the files were uploaded successfully, Launchpad will go ahead and build the .deb-file for given distribution. If you like, check out the Syncany Realease PPA to see the result, or the Travis-CI output to see how it’s done in the wild.
4. Windows installers with Inno Setup on Linux (automated using Gradle)
Inno Setup can create pretty neat installers for Windows — and since I really like how the resulting installer looks like, I wanted to use it for Syncany. In case you’ve never seen an Inno Setup created installer, here’s what it looks like:
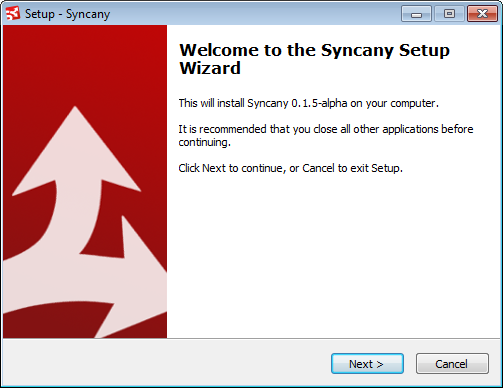
Unfortunately, the software itself is only available on Windows which makes the build process for Syncany a bit trickier, because the continuous integration server (Travis-CI) runs Linux. This didn’t stop me though.
4.1. Manually creating an installer on Linux
Without any automation, it’s pretty easy: Simple install Wine (Windows emulator), then download/install Inno Setup within Wine. With Inno Setup installed, you can either run the GUI to create/edit your install file (.iss-file) or use the Inno Setup command line compiler (ISCC.exe) to compile it from anywhere.
For Syncany, the setup.iss file looks like this (excerpt):
|
1 2 3 4 5 6 7 8 9 10 11 12 13 14 |
[Setup] AppName=Syncany AppId=Syncany AppVersion=0.1.5-alpha+SNAPSHOT.1405271541.git74c737d AppVerName=Syncany 0.1.5-alpha // ... [Files] Source: "*"; DestDir: "{app}" Source: "bin\\*"; DestDir: "{app}\\bin"; Excludes: "syncany,syncanyd,sy,syd" Source: "lib\\*"; DestDir: "{app}\\lib" // ... |
To compile this .iss-file and package the .exe-installer on Linux, you can either click the little play icon in the Inno Setup GUI or run wine "C:\Program Files (x86)\Inno Setup 5\ISCC.exe" "setup.iss" "/q" on the command line.
4.2. Automating installer creation on Linux
To automate this process, we need to do a few more things:
- Preparation: Install Wine and Inno Setup on Linux without user interaction or an attached display
- During build: Automatically replace version numbers in the setup.iss file
4.2.1. Install Wine and Inno Setup on Linux without user interaction
Installing Wine is easy: a simple apt-get install wine is enough on a Debian based system. To install Inno Setup within wine, however, one needs to download a tool called innoextract to extract the Inno Setup installer (is.exe), and then copy the extracted Inno Setup executables somewhere in Wine’s virtual C:\ drive:
|
1 2 3 4 5 6 7 |
add-apt-repository --yes ppa:arx/release apt-get update -d apt-get install -y -q innoextract wget -O is.exe http://www.jrsoftware.org/download.php/is.exe innoextract is.exe mkdir -p ~/".wine/drive_c/inno" cp -a app/* ~/".wine/drive_c/inno" |
For Syncany, I described these steps in the Travis-CI instruction file .travis.yml and the tiny shell script innoinstall.sh.
4.2.2. Build .exe-installer with Inno Setup in Gradle
After that preparation, the actual building is not much effort. This gradle exe task copies over the necessary resources into the build directory and then calls the Inno Setup compiler ISCC (wrapped in the tiny shell script iscc).
|
1 2 3 4 5 6 7 8 9 10 11 12 13 14 15 16 17 18 19 20 21 22 23 24 25 26 27 28 |
task exe(dependsOn: ["installApp"]) << { def innoSetupDir = new File("${buildDir}/innosetup") delete innoSetupDir innoSetupDir.mkdir(); copy { from("${rootProject.projectDir}/gradle/innosetup/setup-left.bmp") from("${rootProject.projectDir}/gradle/innosetup/setup-top.bmp") // ... into(innoSetupDir) } copy { from("${rootProject.projectDir}/gradle/innosetup/setup.iss.skel") rename("setup.iss.skel", "setup.iss") expand([ applicationVersion: "${applicationVersion}", applicationVersionFull: "${applicationVersionFull}", ]) into(innoSetupDir) } exec { workingDir rootProject.projectDir commandLine "iscc ${innoSetupDir}/setup.iss".split() } } |
While copying the main Inno Setup build file setup.iss, the application version is replaced with the version that’s currently being built (as shown above) using the expand() method.
Once you’ve run gradle exe, an installer will be created: syncany-0.1.5-alpha+SNAPSHOT.1405271541.git74c737d.exe.
5. Summary
Even though these are not all Gradle-only topics and they are only partially related, I hope that they are still valuable to you guys. Please let me know what you think and please feel free to give feedback if you like. I am not a Gradle Pro and I’d love to learn how things could be improved.
Thanks for sharing this! I used Gradle + Inno Setup to automatically create Windows installers.
For the Gradle code, I made the task depend on
installDistand instead of delete and mkdir I just useddelete fileTree(dir: innoSetupDir).I also made some changes in the Pascal code section of Inno Setup, since it is possible to have a value for JAVA_HOME regarding of Java being installed or not. So, I check first if JDK/JRE exists and only then I decide about JAVA_HOME.
The Inno Setup section was extremely helpful, thanks
Great article. If you ever consider updating the article, I suggest including a Mac app bundler into the examples.